Epoxy Flooring Sydney | Local Experts for Garage & Home Floors has become the most trusted solution for transforming residential garages, commercial warehouses, and industrial spaces across Sydney. If you’re dealing with cracked concrete, stained floors, or surfaces that can’t handle heavy traffic, you’re not alone. Thousands of Sydney homeowners and business owners face the same challenge every year: outdated, unsafe floors that cost money to maintain and create safety hazards.
Here’s why this matters. A properly installed epoxy flooring system in Sydney doesn’t just look good. It protects your concrete from chemical spills, prevents dust buildup, and can last 20+ years when done right. Whether you’re a homeowner in Castle Hill looking to upgrade your garage or a warehouse manager in Western Sydney seeking industrial-grade flooring, this guide will help you identify the key factors to consider, avoid common pitfalls, and select the right epoxy flooring service.
You’ll learn about common installation mistakes that void warranties, the real cost of cheap DIY kits versus professional installation, and why floor preparation is the key to a floor that lasts 20 years, not just 2. We’ll also cover local Sydney regulations, recommended products for our climate, and how to spot red flags in quotes. For professional epoxy flooring Sydney services backed by 12+ years of experience, contact our team for a free on-site assessment.
According to Standards Australia’s AS 3958 guidelines for industrial floor coatings, proper surface preparation and substrate assessment are critical for long-term flooring performance, a fact many DIY installers discover too late.
Pro Tip:
Always ask your epoxy flooring contractor about their surface preparation process. Companies that skip diamond grinding or moisture testing often deliver floors that peel within 12 months.
Epoxy Flooring Sydney – Related Common Problems People Face
When it comes to epoxy flooring installations in Sydney, most failures happen before the first coat is even applied. These aren’t minor issues; they’re deal-breakers that cost thousands in repairs. Based on our 2,000+ completed projects across Sydney, here are the problems we see most often.
What Issues Can Occur Without Proper Floor Preparation Before Epoxy Flooring Installation?
What happens:
You hire a contractor, they show up, and they start applying epoxy within an hour. Sounds efficient, right? Wrong. Without proper grinding, degreasing, and crack repair, the epoxy won’t bond to the concrete. It sits on top like a sticker, and within 6-12 months, you’ll see bubbling, peeling, or entire sections lifting off.
Why does it happen?
Many contractors skip preparation to save time and undercut competitors. Diamond grinding equipment costs money, and proper prep can take 1-2 days for a standard garage. Some installers assume the concrete “looks clean enough” without testing for oil contamination or moisture levels.
Issues without proper floor preparation:
- Epoxy doesn’t bond to concrete pores, leading to delamination
- Existing oils, sealers, and contaminants prevent adhesion
- Surface laitance (weak concrete layer) causes premature failure
- Uneven surfaces create pooling and weak spots
- Moisture trapped under epoxy causes bubbling (osmotic blistering)
What Happens If Underlying Concrete Damage Is Not Fixed Before Epoxy Coating?
What happens:
Your concrete has cracks, spalling (flaking), or areas where aggregate is exposed. The contractor says, “Don’t worry, the epoxy will cover it.” But epoxy isn’t a structural repair product. It’s a coating. If the concrete underneath is damaged, the epoxy will crack and fail in the same spots within months.
Why does it happen?
Structural concrete repair requires different materials (polymer mortars, epoxy fillers, or even re-pouring sections). It’s time-consuming and adds cost. Some contractors avoid mentioning it to keep quotes low, hoping customers won’t notice until after the job is done.
Consequences of unrepaired concrete damage:
- Cracks continue to spread underneath the epoxy coating
- Moisture enters through cracks, causing rust stains and delamination
- Spalled areas create uneven surfaces that trap dirt and bacteria
- Load-bearing capacity is compromised in industrial settings
- Warranty claims are denied because the substrate was unsuitable
Warning:
Never apply epoxy over concrete that’s less than 28 days old (standard cure time) or that has visible moisture. Use a plastic sheet test: tape a 1m² plastic sheet to the floor for 24 hours. If condensation appears underneath, the concrete is too wet for epoxy.
Can Poor Substrate Repair Affect Epoxy Floor Durability?
What happens:
Even when contractors do repair the concrete, many use the wrong products. Standard cement or cheap fillers shrink, crack, or don’t bond properly to the existing concrete. This creates weak points where the epoxy can fail.
Why does it happen?
Quality substrate repair products (like polyurethane or epoxy-based mortars) cost 3-5x more than standard cement. Many contractors use what’s cheapest or most convenient, not what’s best for long-term durability.
How poor substrate repair affects epoxy floors:
- Shrinkage cracks in repairs create stress points in the epoxy
- Incompatible materials don’t bond chemically, causing separation
- Weak repairs fail under traffic, taking the epoxy layer with them
- Moisture penetrates through poorly sealed repairs
- Uneven heights create trip hazards and visual defects
Proper substrate repair checklist:
- Clean all loose material from cracks and spalls
- Use polymer-modified or epoxy-based repair mortars
- Apply bonding agents before filling
- Match or exceed the strength of existing concrete
- Allow full cure time before epoxy application (24-72 hours, depending on product)
Do Expansion Joints and Coving Impact Epoxy Floor Performance?
What happens:
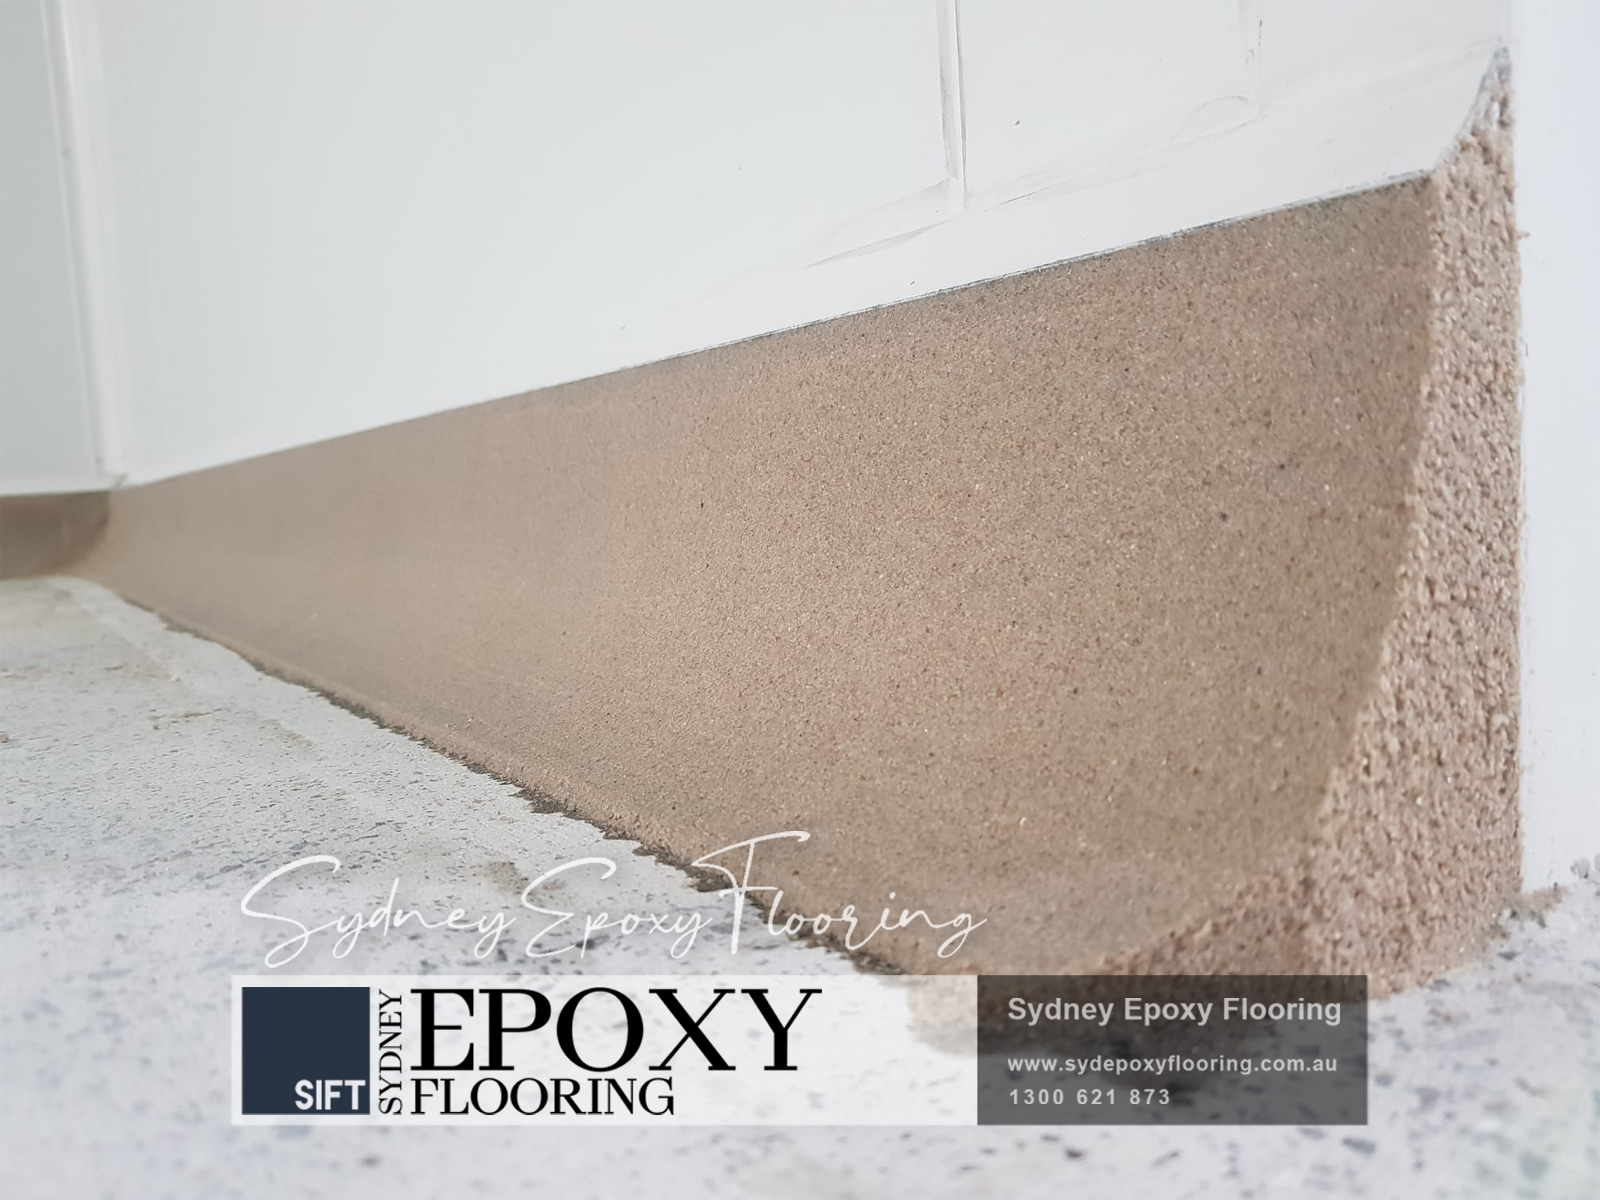
Concrete naturally expands and contracts with temperature changes. Expansion joints (deliberate gaps) accommodate this movement. If you fill these joints with rigid epoxy or ignore them, the floor will crack. Similarly, coving (curved edges where the floor meets the wall) prevents liquid spills from pooling in corners, but many installers skip this step.
Why does it happen?
Proper joint treatment requires flexible sealants and careful application. Coving adds labor time. Contractors unfamiliar with industrial standards often treat all flooring jobs like residential garages, where these details are less critical.
Problems when expansion joints aren’t properly treated:
- Epoxy cracks along joint lines due to concrete movement
- Joints become weak points for chemical penetration
- Cleaning becomes difficult as dirt accumulates in cracks
- In industrial settings, forklift traffic accelerates joint deterioration
- Water and chemicals seep through joints, damaging the substrate
Problems without proper coving:
- Liquids pool in 90-degree corners, creating slip hazards
- Corners are hard to clean, promoting bacterial growth
- Walls can wick moisture, causing paint failure and mold
- In food/pharma environments, failed hygiene inspections
Correct approach:
- Leave expansion joints as flexible joints with polyurethane sealants
- Or fill with semi-rigid epoxy products designed for joint movement
- Install 50-100mm coving radius where the floor meets the walls
- Use corner trowels to create smooth, cleanable transitions
Is Old Floor Removal Necessary Before Installing Epoxy Flooring?
What happens:
Your garage or warehouse already has an old coating, maybe a failing epoxy, paint, or sealer. The new contractor says they can apply new epoxy right over it to save time. Bad idea. If the old coating is loose or incompatible, the new layer will fail just as quickly.
Why does it happen?
Removing old coatings properly requires shot blasting, grinding, or chemical strippers, all time-intensive and expensive. Some contractors gamble that the old coating is “good enough” to serve as a base.
Why removing old floors is essential:
- New epoxy bonds to the old coating, not the concrete, if the old coating fails, so does the new one
- Incompatible products can cause chemical reactions (bubbling, blistering)
- Old coatings may contain oils, waxes, or contaminants that prevent adhesion
- You can’t assess the concrete’s condition if it’s hidden under old material
- Warranty claims are denied if substrate preparation wasn’t thorough
When you can apply epoxy over existing surfaces:
- Old epoxy is 100% intact with no peeling, cracking, or delamination
- Surface has been abraded (lightly ground) for mechanical bonding
- Old coating is chemically compatible (check with manufacturer)
- Concrete underneath is confirmed to be sound (through test areas)
Epoxy Flooring Types Comparison Table
| Epoxy Type | Best For | Durability | Chemical Resistance | Typical Lifespan |
| Standard Epoxy | Residential garages, light workshops | Medium (3-5 years) | Low to medium | 5-10 years |
| 100% Solids Epoxy | Industrial warehouses, heavy traffic | High (10-20 years) | High | 15-25 years |
| Polyurethane Cement | Food processing, commercial kitchens | Very high (thermal shock resistant) | Very high (acids, fats) | 20-30 years |
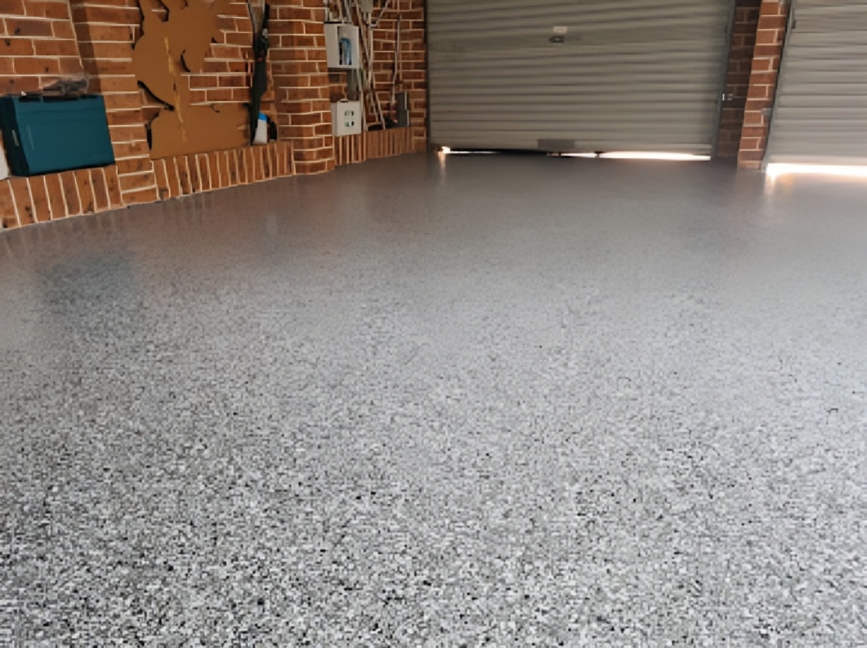
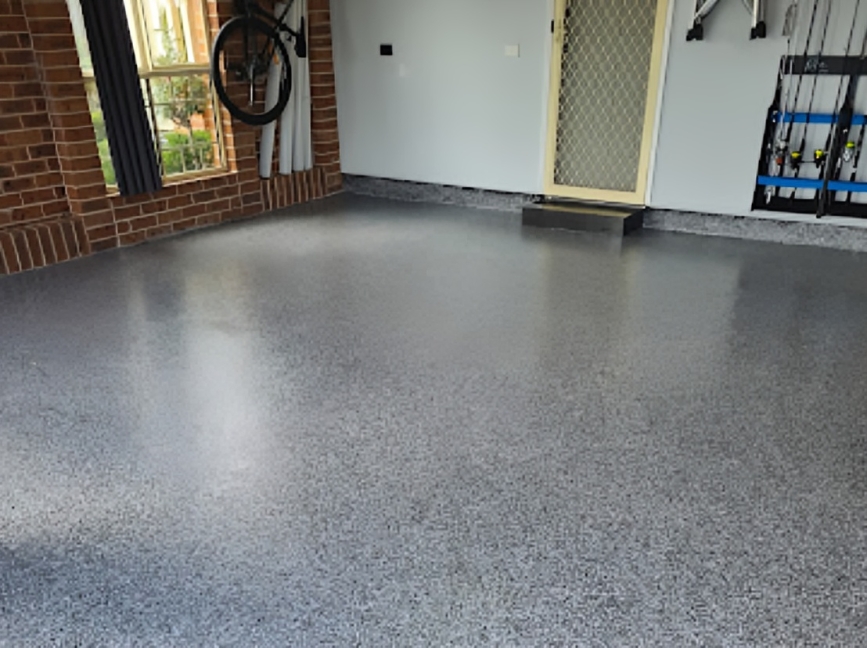
| Decorative Flake Epoxy | Show garages, retail spaces | Medium to high | Medium | 10-15 years |
| Metallic Epoxy | Homes, showrooms, galleries | Medium | Medium | 10-15 years |
Prices vary based on floor condition, access, and specific requirements.
Highlight:
For Sydney’s climate, UV-resistant topcoats are essential for outdoor applications (patios, pool surrounds). Standard epoxy yellows under UV exposure within 6-12 months. Always specify aliphatic polyurethane topcoats for exterior projects.
Best Solutions for Epoxy Flooring Sydney
Now that you understand what can go wrong, here’s how professional epoxy flooring Sydney contractors solve these problems. These aren’t shortcuts; they’re the industry-standard processes that ensure your floor lasts 15-20+ years instead of failing in 18 months.
Solution 1: Comprehensive Surface Preparation (The Foundation of Success)
Why this works:
Epoxy is only as strong as what it’s bonded to. Proper surface preparation creates a clean, porous surface with an optimal profile for mechanical bonding. This isn’t optional; it’s the difference between a floor that lasts 2 years and one that lasts 20 years.
Step-by-step professional preparation process:
- Initial Assessment
- Moisture testing (calcium chloride test or RH probe)
- Oil/contamination check (water bead test)
- Concrete strength test (rebound hammer or core sample)
- Identify existing coatings or sealers
- Diamond Grinding
- Removes surface laitance (weak concrete layer)
- Opens concrete pores for penetration
- Creates CSP 2-3 profile (Concrete Surface Profile per ICRI standards)
- Levels uneven areas and removes minor imperfections
- Crack and Spall Repair
- Route out cracks to clean edges
- Fill with flexible epoxy or polyurethane fillers
- Grind flush after curing
- Reinforce structural cracks with carbon fiber (if needed)
- Degreasing and Cleaning
- Industrial degreasers for oil contamination
- Pressure wash and vacuum
- Neutralize any acid residues
- Allow 24-48 hours for complete drying
- Final Inspection
- Verify moisture levels are below 3.5% (for standard epoxy)
- Check for dust, loose material, or contaminants
- Test adhesion in small areas if uncertain
Why this solution is essential:
According to a study published by the American Concrete Institute (ACI), over 80% of epoxy flooring failures are due to inadequate surface preparation. Skipping any of these steps dramatically increases failure risk.
Solution 2: Professional Structural Repairs Before Coating
Why this works:
You can’t coat over problems and expect them to disappear. Structural repairs restore the concrete’s integrity, creating a solid foundation for the epoxy system.
Step-by-step repair process:
- Damage Assessment
- Classify damage type (surface, structural, or substrate failure)
- Determine root cause (settlement, impact, chemical attack)
- Decide on repair method (patching, overlay, or replacement)
- Preparation of Repair Areas
- Remove all loose, weak, or contaminated concrete
- Clean to sound substrate
- Ensure repair area has proper edges (saw cut if needed)
- Apply bonding agent to existing concrete
- Material Selection
- Use polymer-modified mortars for most repairs
- Epoxy mortars for chemical-exposed areas
- Rapid-set products where downtime is limited
- Match or exceed existing concrete strength
- Application and Curing
- Apply in lifts (layers) if depth exceeds 25mm
- Trowel to smooth finish, matching the surrounding floor
- Protect from traffic and moisture during cure
- Allow a minimum of 24-48 hours before epoxy application
- Surface Profile Matching
- Lightly grind repaired areas to match the surrounding texture
- Ensure repairs are flush with the existing floor
- Test bonding in repair areas before full coating
Why is this solution essential:
Structural issues don’t fix themselves. Ignoring them voids warranties and creates liability issues. Professional repairs properly bonded and cured become stronger than the original concrete.
Solution 3: Proper Expansion Joint Treatment
Why this works:
Joints exist for a reason: to accommodate movement. Trying to eliminate them creates new problems. The solution is to treat them correctly so they remain functional while sealed.
Step-by-step joint treatment:
- Joint Identification and Classification
- Expansion joints (designed for movement): Must remain flexible
- Control joints (minimize random cracking): Can be filled or left flexible
- Construction joints (where concrete pours meet): Usually rigid-filled
- Joint Preparation
- Clean out all loose material, dirt, and old sealant
- Use wire brushes, grinders, or vacuum tools
- Ensure joint edges are sound and clean
- Backer Rod Installation (for flexible joints)
- Insert closed-cell foam backer rod to proper depth
- Typically 1/4″ to 1/2″ below floor surface
- Prevents three-sided bonding (which limits flexibility)
- Sealant Application
- Use polyurethane or silicone sealants for expansion joints
- Two-part epoxy for rigid construction joints
- Tool to smooth finish flush with floor
- Allow full cure before epoxy application
- Epoxy Application Around Joints
- Terminate epoxy at joint edges cleanly
- Don’t bridge flexible joints with rigid epoxy
- Consider joint covers or metal plates in high-traffic areas
Why this solution is essential:
Properly treated joints last as long as the floor itself. Incorrectly treated joints become the first point of failure and can compromise the entire installation.
Solution 4: Complete Old Coating Removal
Why this works:
Starting with a clean slate ensures the new epoxy bonds directly to concrete, not to a potentially failing intermediate layer. This is non-negotiable for long-term performance.
Step-by-step removal process:
- Coating Identification
- Test to determine coating type (epoxy, polyurethane, acrylic, etc.)
- Assess condition (bonded vs. delaminating)
- Determine the removal method needed
- Mechanical Removal
- Shot blasting (most effective, cleanest result)
- Diamond grinding (slower but precise)
- Scarifying (for thick coatings or heavy-duty removal)
- Floor planners (for multi-layer coatings)
- Chemical Stripping (if mechanical methodsare insufficient)
- Apply commercial coating strippers
- Allow dwell time (per manufacturer instructions)
- Scrape and pressure wash residue
- Neutralize any chemical residues
- Post-Removal Cleaning
- Vacuum all dust and debris
- Pressure wash and allow drying
- Verify complete removal (no residual coating)
- Surface Profile Check
- Ensure concrete has adequate profile (CSP 2-3)
- Additional grinding if the surface is too smooth
Why this solution is essential:
The Australian Building Codes Board (ABCB) requires proper substrate preparation for commercial flooring systems. Insurance and warranty claims can be denied if the removal wasn’t done properly.
Solution 5: Professional Installation Process
Why this works:
Even with perfect preparation, epoxy application requires expertise. Temperature, humidity, mixing ratios, and application techniques all affect the outcome.
Step-by-step installation process:
- Environmental Check
- Verify temperature (15-30°C ideal for most epoxies)
- Check humidity levels (<75% RH)
- Ensure proper ventilation
- Plan for cure time based on conditions
- Primer Application
- Mix primer components thoroughly
- Apply with roller or squeegee
- Ensure complete coverage without puddles
- Allow specified cure time (typically 4-12 hours)
- Base Coat Application
- Mix epoxy resin and hardener per the manufacturer’s specs
- Apply in sections (pot life typically 30-45 minutes)
- Use a notched squeegee for even thickness
- Back-roll to remove air bubbles and ensure coverage
- Decorative Elements (if applicable)
- Broadcast flakes/quartz while the base coat is tacky
- Apply uniformly for consistent coverage
- Allow full cure before topcoat
- Topcoat Application
- Scrape off any raised flakes or imperfections
- Apply a clear epoxy or polyurethane topcoat
- Multiple thin coats are better than one thick coat
- Ensure complete coverage for UV/wear protection
Why this solution is essential:
Professional installation follows manufacturer guidelines precisely, ensuring warranties remain valid and performance meets expectations.
Epoxy Flooring vs. Other Options Comparison
| Feature | Epoxy Flooring | Polished Concrete | Tiles | Painted Concrete |
| Installation Time | 3-5 days (inc. cure) | 5-7 days | 7-10 days | 1-2 days |
| Durability (Years) | 15-25 | 20-30 | 10-20 | 2-5 |
| Chemical Resistance | High | Medium | Low (grout vulnerable) | Low |
| Maintenance | Low (mop and occasional polish) | Medium (regular polishing) | High (grout cleaning) | High (touch-ups) |
| Slip Resistance | High (with aggregate) | Medium to high | Varies by tile | Low to medium |
| Customization | High (colors, patterns, flakes) | Low (natural concrete look) | High (many tile options) | Low (color only) |
| Repair Difficulty | Medium (spot repairs possible) | Low (regrind and repolish) | High (tile replacement) | Low (repaint) |
Why Choose Our Epoxy Flooring Sydney Services
Sydney Epoxy Flooring has been working on floors across Sydney for over 12 years. Our 120-person team has completed over 2,000 projects throughout the city, from Castle Hill to Liverpool, Parramatta to Penrith, across residential, commercial, and industrial applications.
Our Process: From Quote to Completion
Step 1: Initial Consultation (Free) We discuss your project type (garage, warehouse, workshop, etc.), timeline, and specific requirements. We’ll ask about the current floor condition, traffic type, and any special needs (chemical resistance, decorative finishes, etc.).
Step 2: Onsite Inspection & Assessment Our technician visits your location to:
- Test concrete moisture levels
- Check for oil/chemical contamination
- Assess cracks, spalls, and structural issues
- Measure the area accurately
- Photograph existing conditions
- Discuss colour and finish options
This typically takes 30–45 minutes. We’ll provide a detailed report within 24 hours.
Step 3: Detailed Quote We provide a comprehensive written quote that includes:
- Complete scope of work (preparation, repairs, coating)
- Materials specified by brand and product codes
- Timeline with start and completion dates
- Total cost breakdown (no hidden fees)
- Warranty details
- Payment terms
Step 4: Surface Preparation
- Diamond grinding to CSP 2–3 profile
- Crack and spall repairs using polymer mortars
- Expansion joint treatment
- Degreasing and final cleaning
- Moisture testing before coating
This phase typically takes 1–2 days, depending on floor condition.
Step 5: Application
- Primer coat applied
- Base epoxy coat with chosen colour system
- Decorative elements (flakes, quartz, metallic), if selected
- Clear topcoat for protection and gloss
- Final inspection and quality check
Application takes 2–3 days plus cure time (typically 24–48 hours before light foot traffic, 7 days before full use).
Step 6: Curing & Final Inspection
- We monitor cure conditions (temperature, humidity)
- Conduct a final walkthrough with you
- Provide maintenance instructions
- Issue a warranty certificate
Quality Materials
We use premium-grade Australian and international brands:
- Sika Australia (epoxy and polyurethane systems)
- Flowcrete (industrial flooring specialists)
- BASF Construction Chemicals
- Dulux Protective Coatings
All materials come with manufacturer warranties, and we’re approved applicators for major brands.
What Our Clients Say
We’ve completed over 2,000 projects across Sydney and hold a 4.9/5 average across 137+ verified Google reviews.
“Really nice floor. Amir did an awesome job and explained a lot of techniques and provided suggestions.” — Aimee, Parramatta
“Very happy to give 5 stars to this crew. The whole experience was smooth, professional, and pleasant.” — Paul, Castle Hill
“The guys were very professional, friendly, and very nice to talk to and answered all my concerns.” — Vishwa, Bankstown
Industry Certifications
Our team holds certifications from:
- Sika Australia (Approved Applicator)
- Flowcrete Australia (Certified Installer)
- IRATA (Industrial Rope Access for high-rise projects)
We’re also recognised by the Master Builders Association (MBA), the Property Council of Australia, and Food Safety Australia for relevant work in those sectors.
Frequently Asked Questions (FAQ)
Q1: Is epoxy flooring Sydney safe for residential garages?
Yes, when professionally installed with anti-slip aggregate, epoxy flooring is very safe for Sydney garages. Textured finishes improve traction, and coving at wall edges helps prevent trip hazards.
Q2: How long does epoxy flooring last in Sydney’s climate?
Residential epoxy flooring typically lasts 15–20 years, while commercial spaces last 10–15 years. Proper preparation and UV-resistant topcoats ensure durability in Sydney’s climate.
Q3: Can I apply epoxy flooring over tiles in Sydney?
Yes, if tiles are fully bonded and properly diamond-ground for adhesion. However, tile removal delivers longer-lasting and more reliable results.
Q4: How long before I can drive on the new epoxy flooring?
Light foot traffic is fine after 24–48 hours. Vehicles should wait 5–7 days for full curing, depending on temperature and humidity.
Q5: Does epoxy flooring work for Sydney outdoor areas like patios?
Yes, but only with UV-resistant systems such as aliphatic polyurethane topcoats. These prevent yellowing and ensure long-term durability outdoors.
Q6: Can epoxy flooring be repaired if damaged?
Small chips or cracks can be spot-repaired, though exact color matching may vary. If damage exceeds 20%, a full recoat is usually more cost-effective.
Q7: Is epoxy flooring better than polished concrete in Sydney?
Epoxy offers better chemical resistance, design options, and moisture protection. Polished concrete lasts longer and suits heavy industrial traffic.
Q8: What chemicals will damage epoxy flooring in Sydney?
Strong acids, strong bases, and solvents like acetone or MEK can damage epoxy. Prompt spill cleanup helps maintain coating integrity.
Q9: Do I need council approval for epoxy flooring in Sydney?
Residential installations usually don’t require approval. Commercial or industrial projects may need compliance certification depending on the scope.
Q10: How do I maintain epoxy flooring in Sydney?
Epoxy flooring is low maintenance; regular sweeping and occasional mopping with a mild detergent keeps it clean. Avoid harsh acids or abrasive cleaners to preserve the finish and extend its lifespan.
Your Next Steps
Epoxy Flooring Sydney | Local Experts for Garage & Home Floors is more than a service, it’s a 15-20 year investment in your property. The difference between a floor that fails in 18 months and one that lasts two decades comes down to preparation, materials, and expertise.
If you’re considering epoxy flooring in Sydney, don’t gamble on cheap quotes or DIY kits. The hidden cost of failure (removal, repairs, re-installation) always exceeds the upfront savings.
Transform your floors with Sydney’s trusted epoxy flooring specialists. Over 700 satisfied customers, 2,000+ completed projects, and 12 years of proven excellence.
Contact Sydney Epoxy Flooring Experts:
Phone: 1300 621 873
Email: info@sydepoxyflooring.com.au
Address: Unit 123/7 Hoyle Ave, Castle Hill, NSW 2154