Achieving a flawless, long-lasting epoxy floor isn’t just about the coating—it starts with meticulous preparation. With over 12 years of experience and 2,000+ completed projects across Sydney, our team at Sydney Epoxy Flooring knows that proper floor preparation is the key to a successful epoxy installation.
Whether it’s a warehouse, garage, commercial space, or decorative residential floor, this guide outlines the essential steps our 120 skilled professionals follow to deliver exceptional results every time.
Why Proper Epoxy Floor Preparation Matters
Many property owners focus solely on the epoxy system, overlooking preparation—the most critical factor for a durable floor. Skipping steps can lead to:
- Peeling, bubbling, or flaking coatings
- Poor adhesion and reduced lifespan
- Uneven, unprofessional finishes
Proper preparation ensures:
- Maximum adhesion between substrate and coating
- Long-term durability against heavy traffic and chemicals
- Smooth, professional finish
- Cost savings by avoiding early repairs or recoating
Initial Consultation and Assessment
Before any work begins, our team conducts a detailed consultation to understand:
- Intended use (heavy machinery, foot traffic, chemical exposure)
- Desired aesthetic (decorative flake, metallic, marble finishes)
- Timeline and budget constraints
- Any existing floor issues
This allows us to tailor a preparation plan specifically for your project.
Site Inspection and Floor Audit
We perform a thorough floor audit to evaluate:
- Moisture Levels: Concrete moisture can compromise adhesion; we conduct vapor emission tests to ensure it’s within safe limits.
- Surface Condition: We inspect for cracks, spalling, contamination, and structural issues.
- Substrate Profile: The concrete must have the right texture for bonding. We determine whether grinding, shot blasting, or scarification is needed.
- Existing Coatings: We assess if old coatings can be prepped for overcoating or need removal.
Clear and Protect the Work Area
A clean, safe workspace is essential:
- Remove furniture and movable items
- Protect walls, fixtures, and adjacent areas
- Ensure proper ventilation for dust and fumes
- Plan to minimize disruption to daily operations
Crack and Damage Repair
Structural issues must be addressed to avoid future problems:
- Cracks: Small cracks are filled with epoxy; larger cracks may require epoxy injection systems.
- Spalling/Divots: Damaged sections are ground and patched.
- Joints: Expansion and control joints are treated with flexible fillers.
Deep Cleaning and Contamination Removal
Concrete must be spotless for proper adhesion:
- High-Pressure Cleaning: Removes dirt, oils, grease, and old sealers.
- Chemical Degreasing: Tackles stubborn oil stains at the molecular level.
- Dust Removal: A thorough vacuum ensures a particle-free surface.
Mechanical Surface Preparation
Creating the right surface profile is critical for bonding:
- Diamond Grinding: Exposes fresh aggregate and levels minor imperfections.
- Shot Blasting: Ideal for large industrial spaces and heavily contaminated surfaces.
- Scarification: Removes thick coatings or tough contaminants.
Target surface profile: Rough enough for bonding but smooth enough for a flawless finish (similar to 80–120 grit sandpaper).
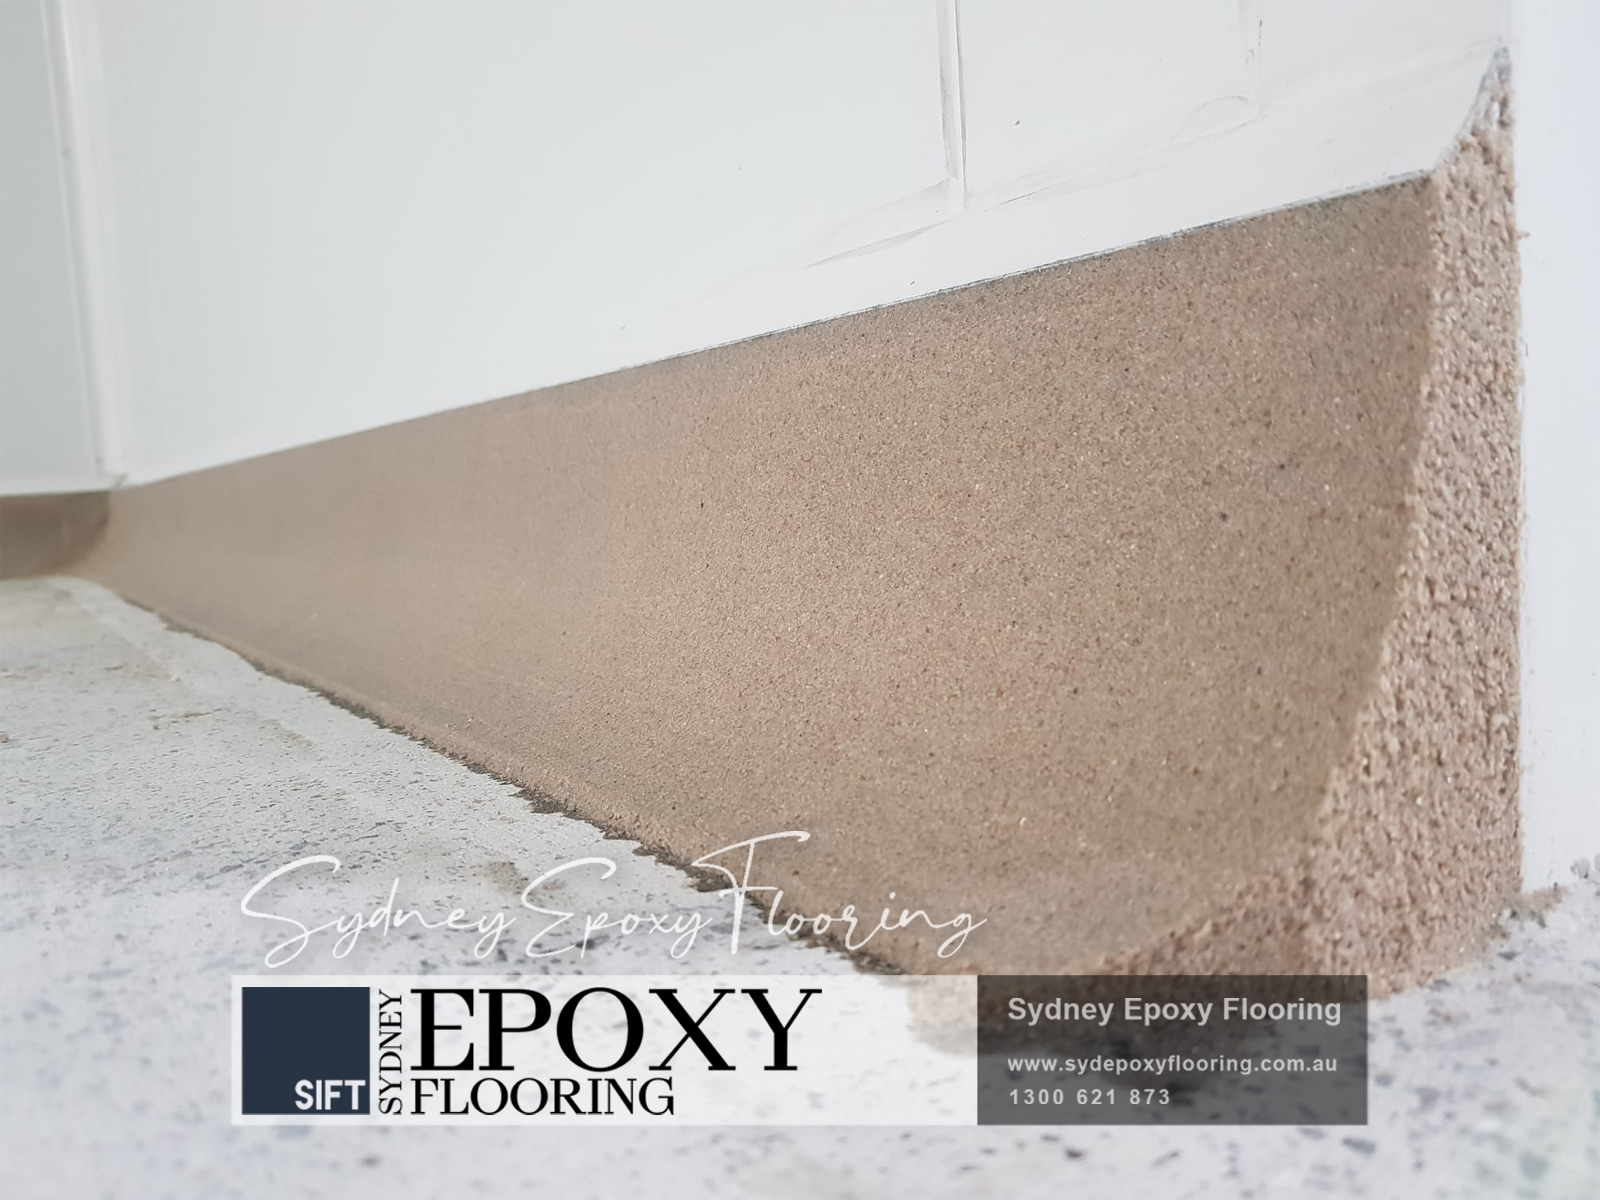
Proper Priming
Priming bridges the substrate and epoxy coating:
- Primer Selection: Based on substrate, moisture levels, and epoxy type
- Standard epoxy primers
- Moisture-mitigating primers
- Penetrating sealers for porous concrete
- Application: Correct coverage and curing
- Edges/Corners: Ensure complete adhesion in tricky areas
Final Inspection Before Coating
Before applying epoxy, we verify:
- Surface is fully clean and dry
- Profile is uniform
- Repairs are complete
- Temperature and humidity are optimal
Only when everything meets our strict standards do we proceed.
Common Preparation Mistakes to Avoid
- Insufficient cleaning → prevents adhesion
- Skipping surface profiling → weak bonding
- Ignoring moisture → bubbling and lifting
- Rushing preparation → coating failure
- Using wrong materials → weak points in the system
Why Professional Preparation Matters
Professional epoxy preparation ensures:
- Specialized Equipment: Industrial grinders, shot blasters, high-pressure cleaners
- Expert Knowledge: Correct substrate profiling and moisture control
- Time Efficiency: Days vs. weeks for DIY approaches
- Warranty Protection: Coverage for your investment
- Safety Compliance: Dust, chemical, and workplace safety
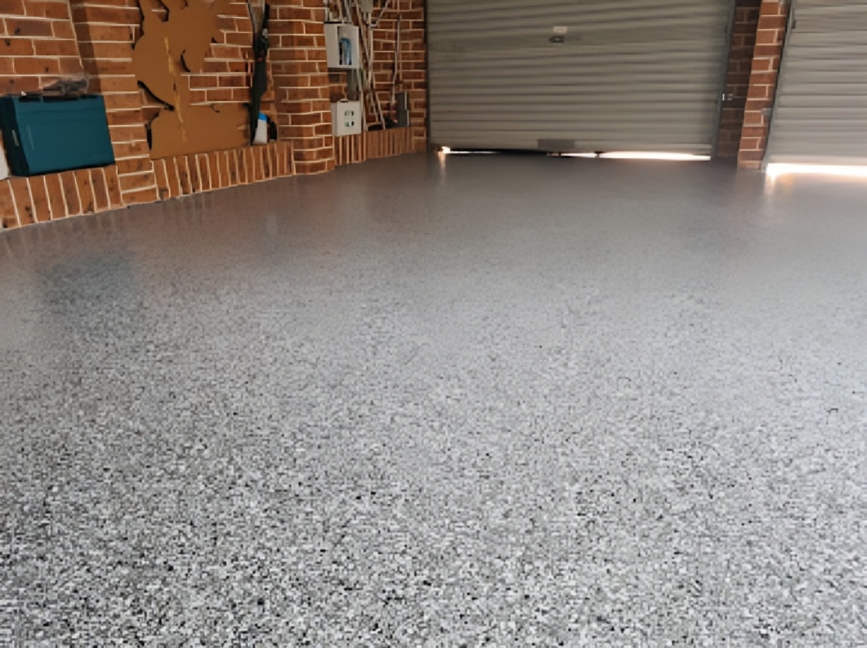
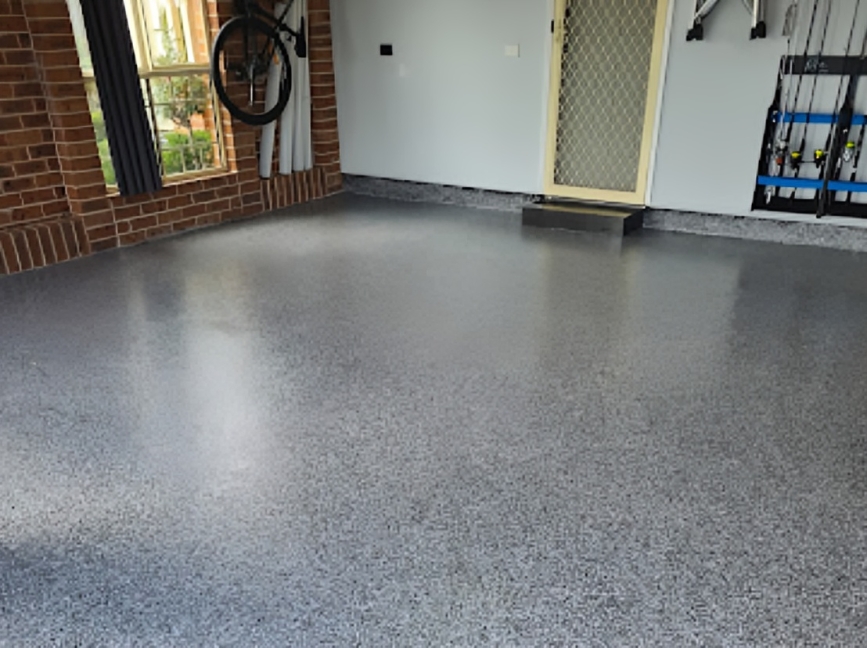
Preparation for Different Applications
- Warehouse/Industrial: Heavy-duty prep for chemical and machinery resistance
- Garage/Workshop: Complete oil contamination removal and crack repair
- Decorative Residential: Smooth surface for flawless finishes
- Outdoor Floors: UV-resistant, moisture-mitigating prep
- Epoxy Over Tiles: Specialized bonding to avoid tile replacement
The Complete Process: From Preparation to Finish
- Initial Consultation
- Site Inspection & Assessment
- Customized Proposal
- Surface Preparation
- Expert Epoxy Application
- Curing & Final Inspection
This approach has earned 700+ happy clients and 137+ verified Google Reviews.
Maintaining Your Epoxy Floor
- Regular sweeping and mopping
- Periodic high-pressure cleaning
- Prompt cleanup of spills (chemicals/oils)
- Protective pads under heavy equipment
Proper care can ensure 10–20+ years of durability.
Common Preparation Mistakes to Avoid
| Mistake | Consequence | How to Avoid |
| Insufficient cleaning | Prevents adhesion | Perform high-pressure cleaning and chemical degreasing |
| Skipping surface profiling | Weak bonding | Use diamond grinding, shot blasting, or scarification as needed |
| Ignoring moisture | Bubbling and lifting | Conduct vapor tests and use moisture-mitigating primers |
| Rushing preparation | Coating failure | Follow step-by-step preparation process |
| Using the wrong materials | Weak points in the system | Select appropriate primers, fillers, and epoxy type |
FAQ – Epoxy Floor Preparation
Q1: How long does epoxy floor preparation take?
A: Depending on size and condition, preparation can take 1–3 days for most projects. Industrial floors may take longer.
Q2: Can epoxy be applied over old coatings?
A: Yes, if the existing coating is stable. Our team evaluates and prepares the surface for optimal adhesion.
Q3: Do you handle moisture issues?
A: Absolutely. We conduct vapor tests and use moisture-mitigating primers when needed.
Q4: Can I DIY epoxy floor preparation?
A: While possible, DIY often leads to adhesion failures. Professional prep ensures durability, safety, and warranty coverage.
Q5: How long before the floor can be used after coating?
A: Standard epoxy typically cures in 24–72 hours, but full chemical and mechanical resistance develops over 7 days.
Ready to Transform Your Floor?
Perfect epoxy floor coating preparation is the foundation of a durable, beautiful floor. With 12+ years of experience, 2,000+ projects, and 120 skilled professionals, Sydney Epoxy Flooring delivers results that last for decades.
Experience the difference of partnering with Sydney’s trusted flooring experts—because a well-prepared floor is a floor that lasts.
Contact Us Today:
Phone: 1300 621 873
Email: info@sydepoxyflooring.com.au
Office: Unit 123/7 Hoyle Ave, Castle Hill, NSW 2154